Celestron Starsense Autoalign review
Description of problem: Before you can start observing or imaging you need to align your telescope.
I have both Celestron and iOptron mounts and I have found that in order to complete a mount alignment accurate enough to easily find deep sky objects, you need to perform a three star alignment.
While this is not difficult, it can be time consuming.
I occasionally am involved in outreach events. During those events it is imperative to be able to setup quickly and accurately as early in the evening as possible.
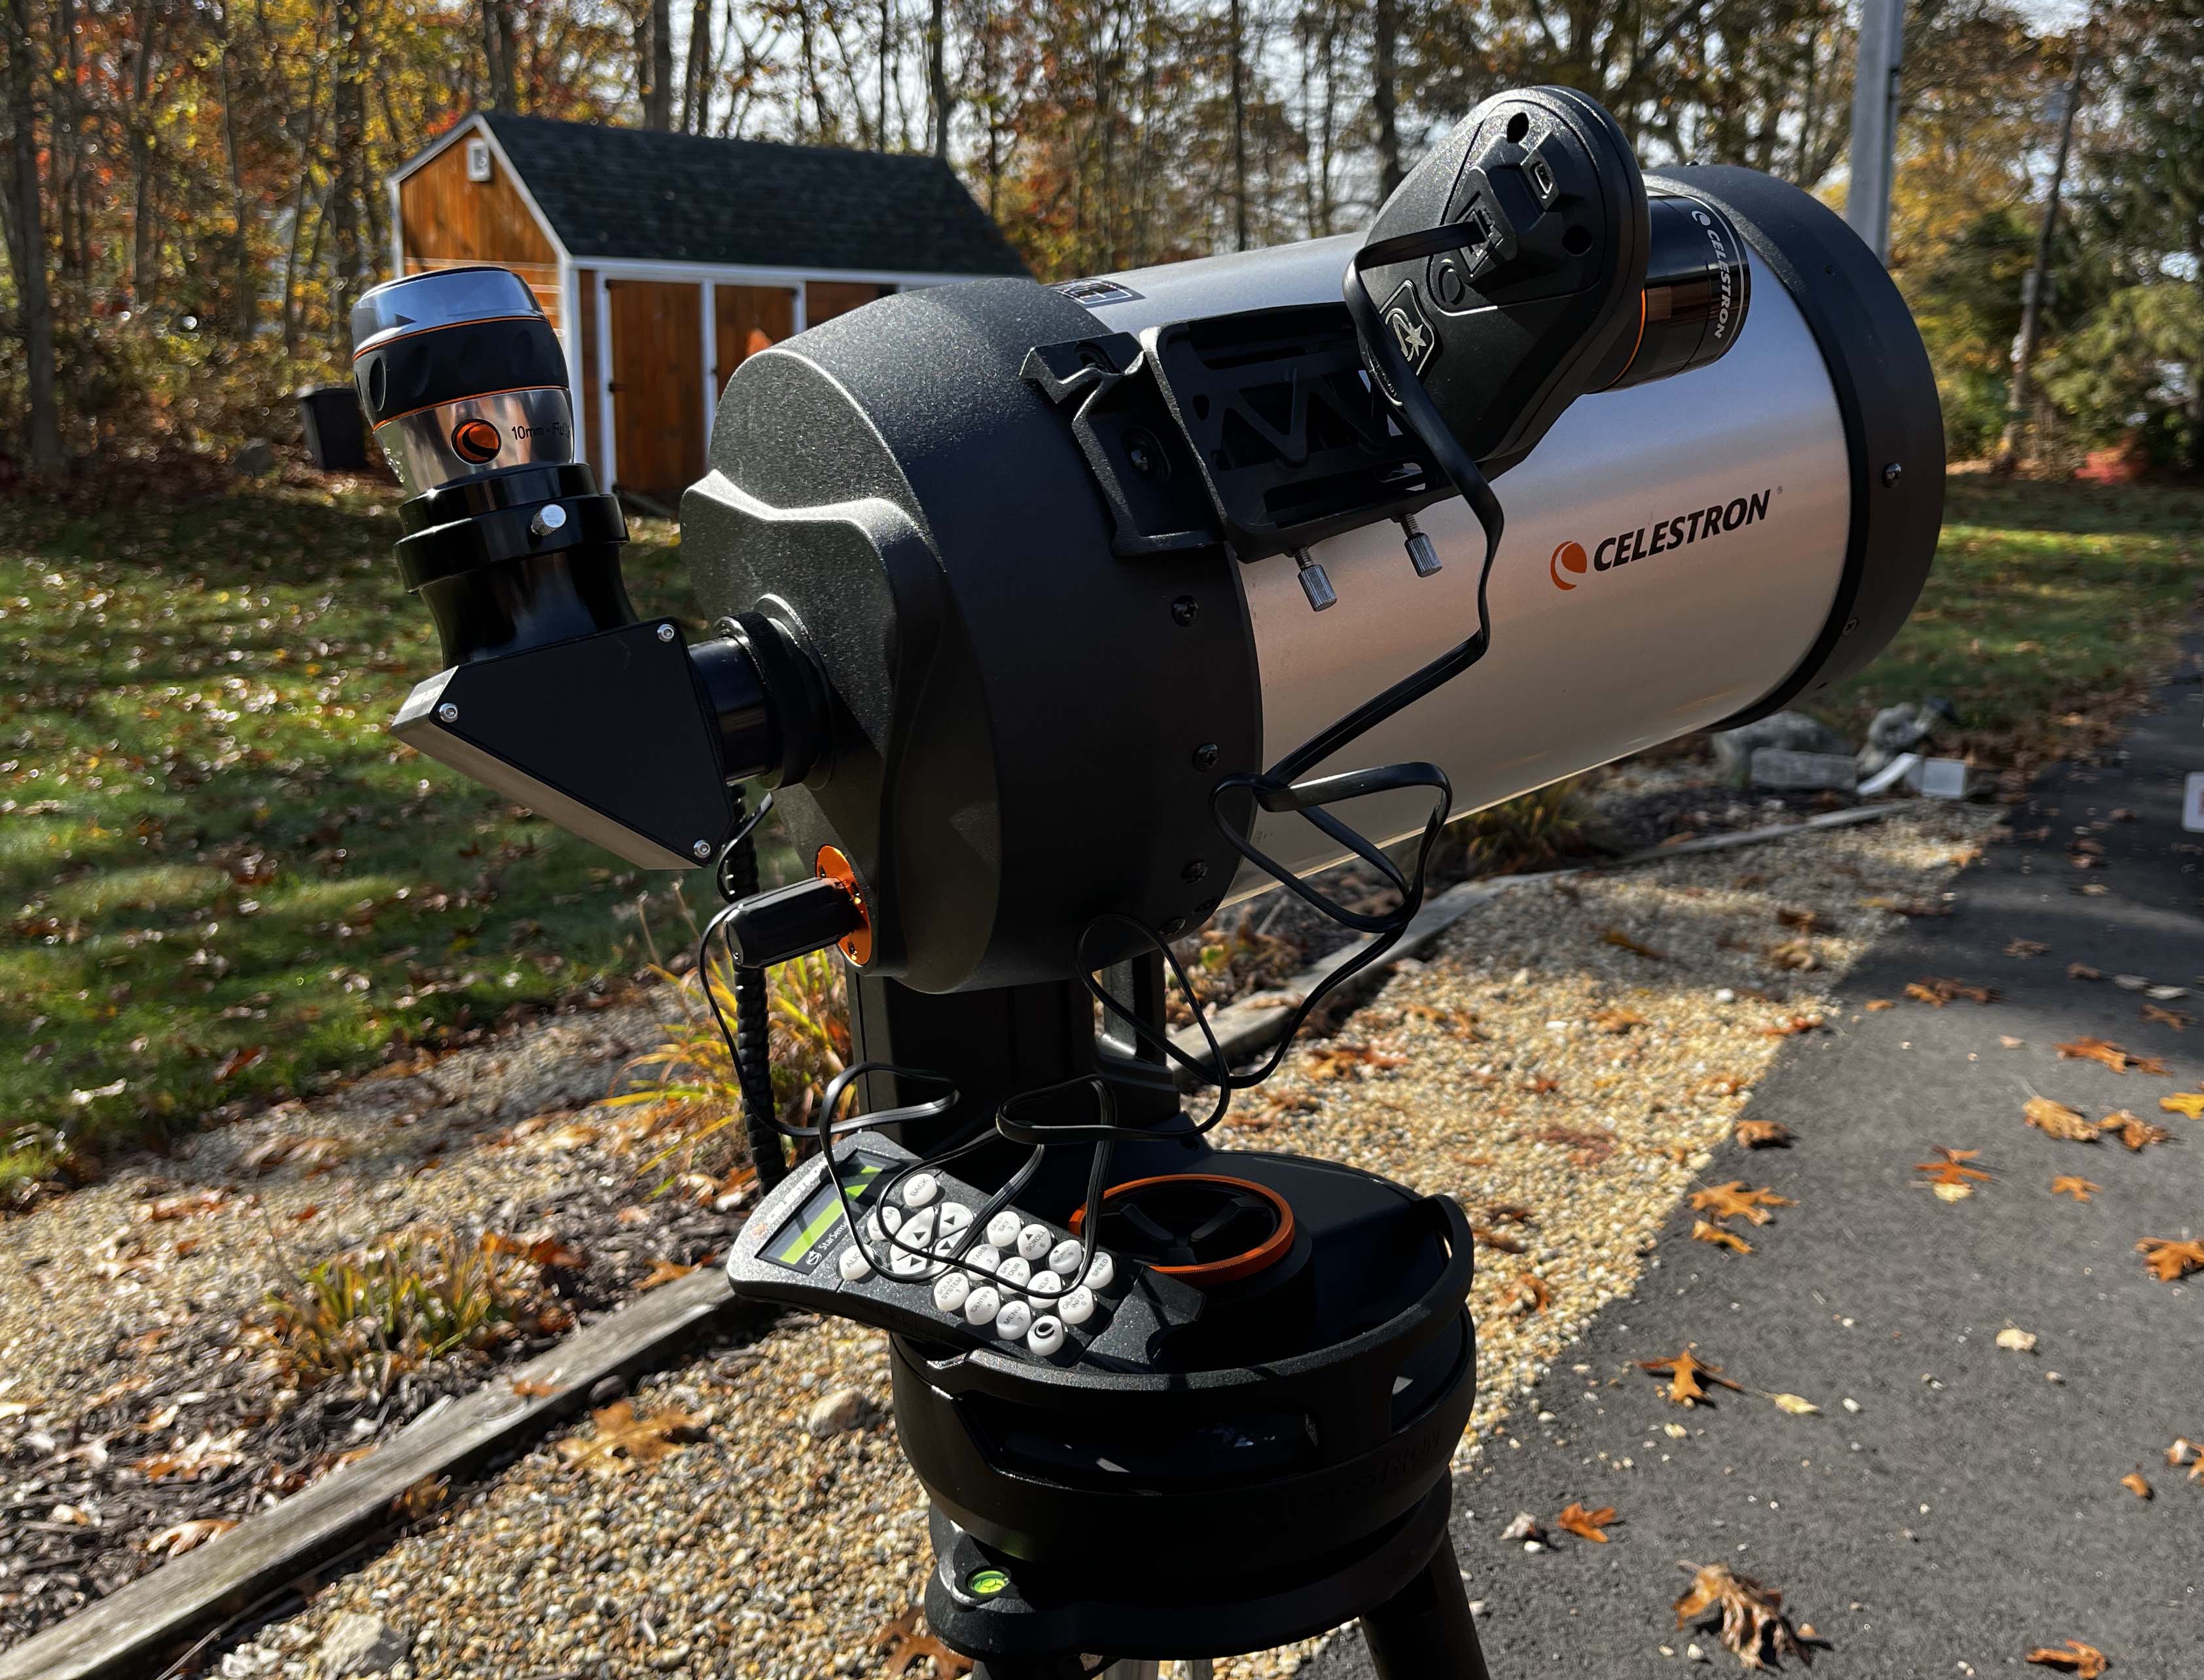
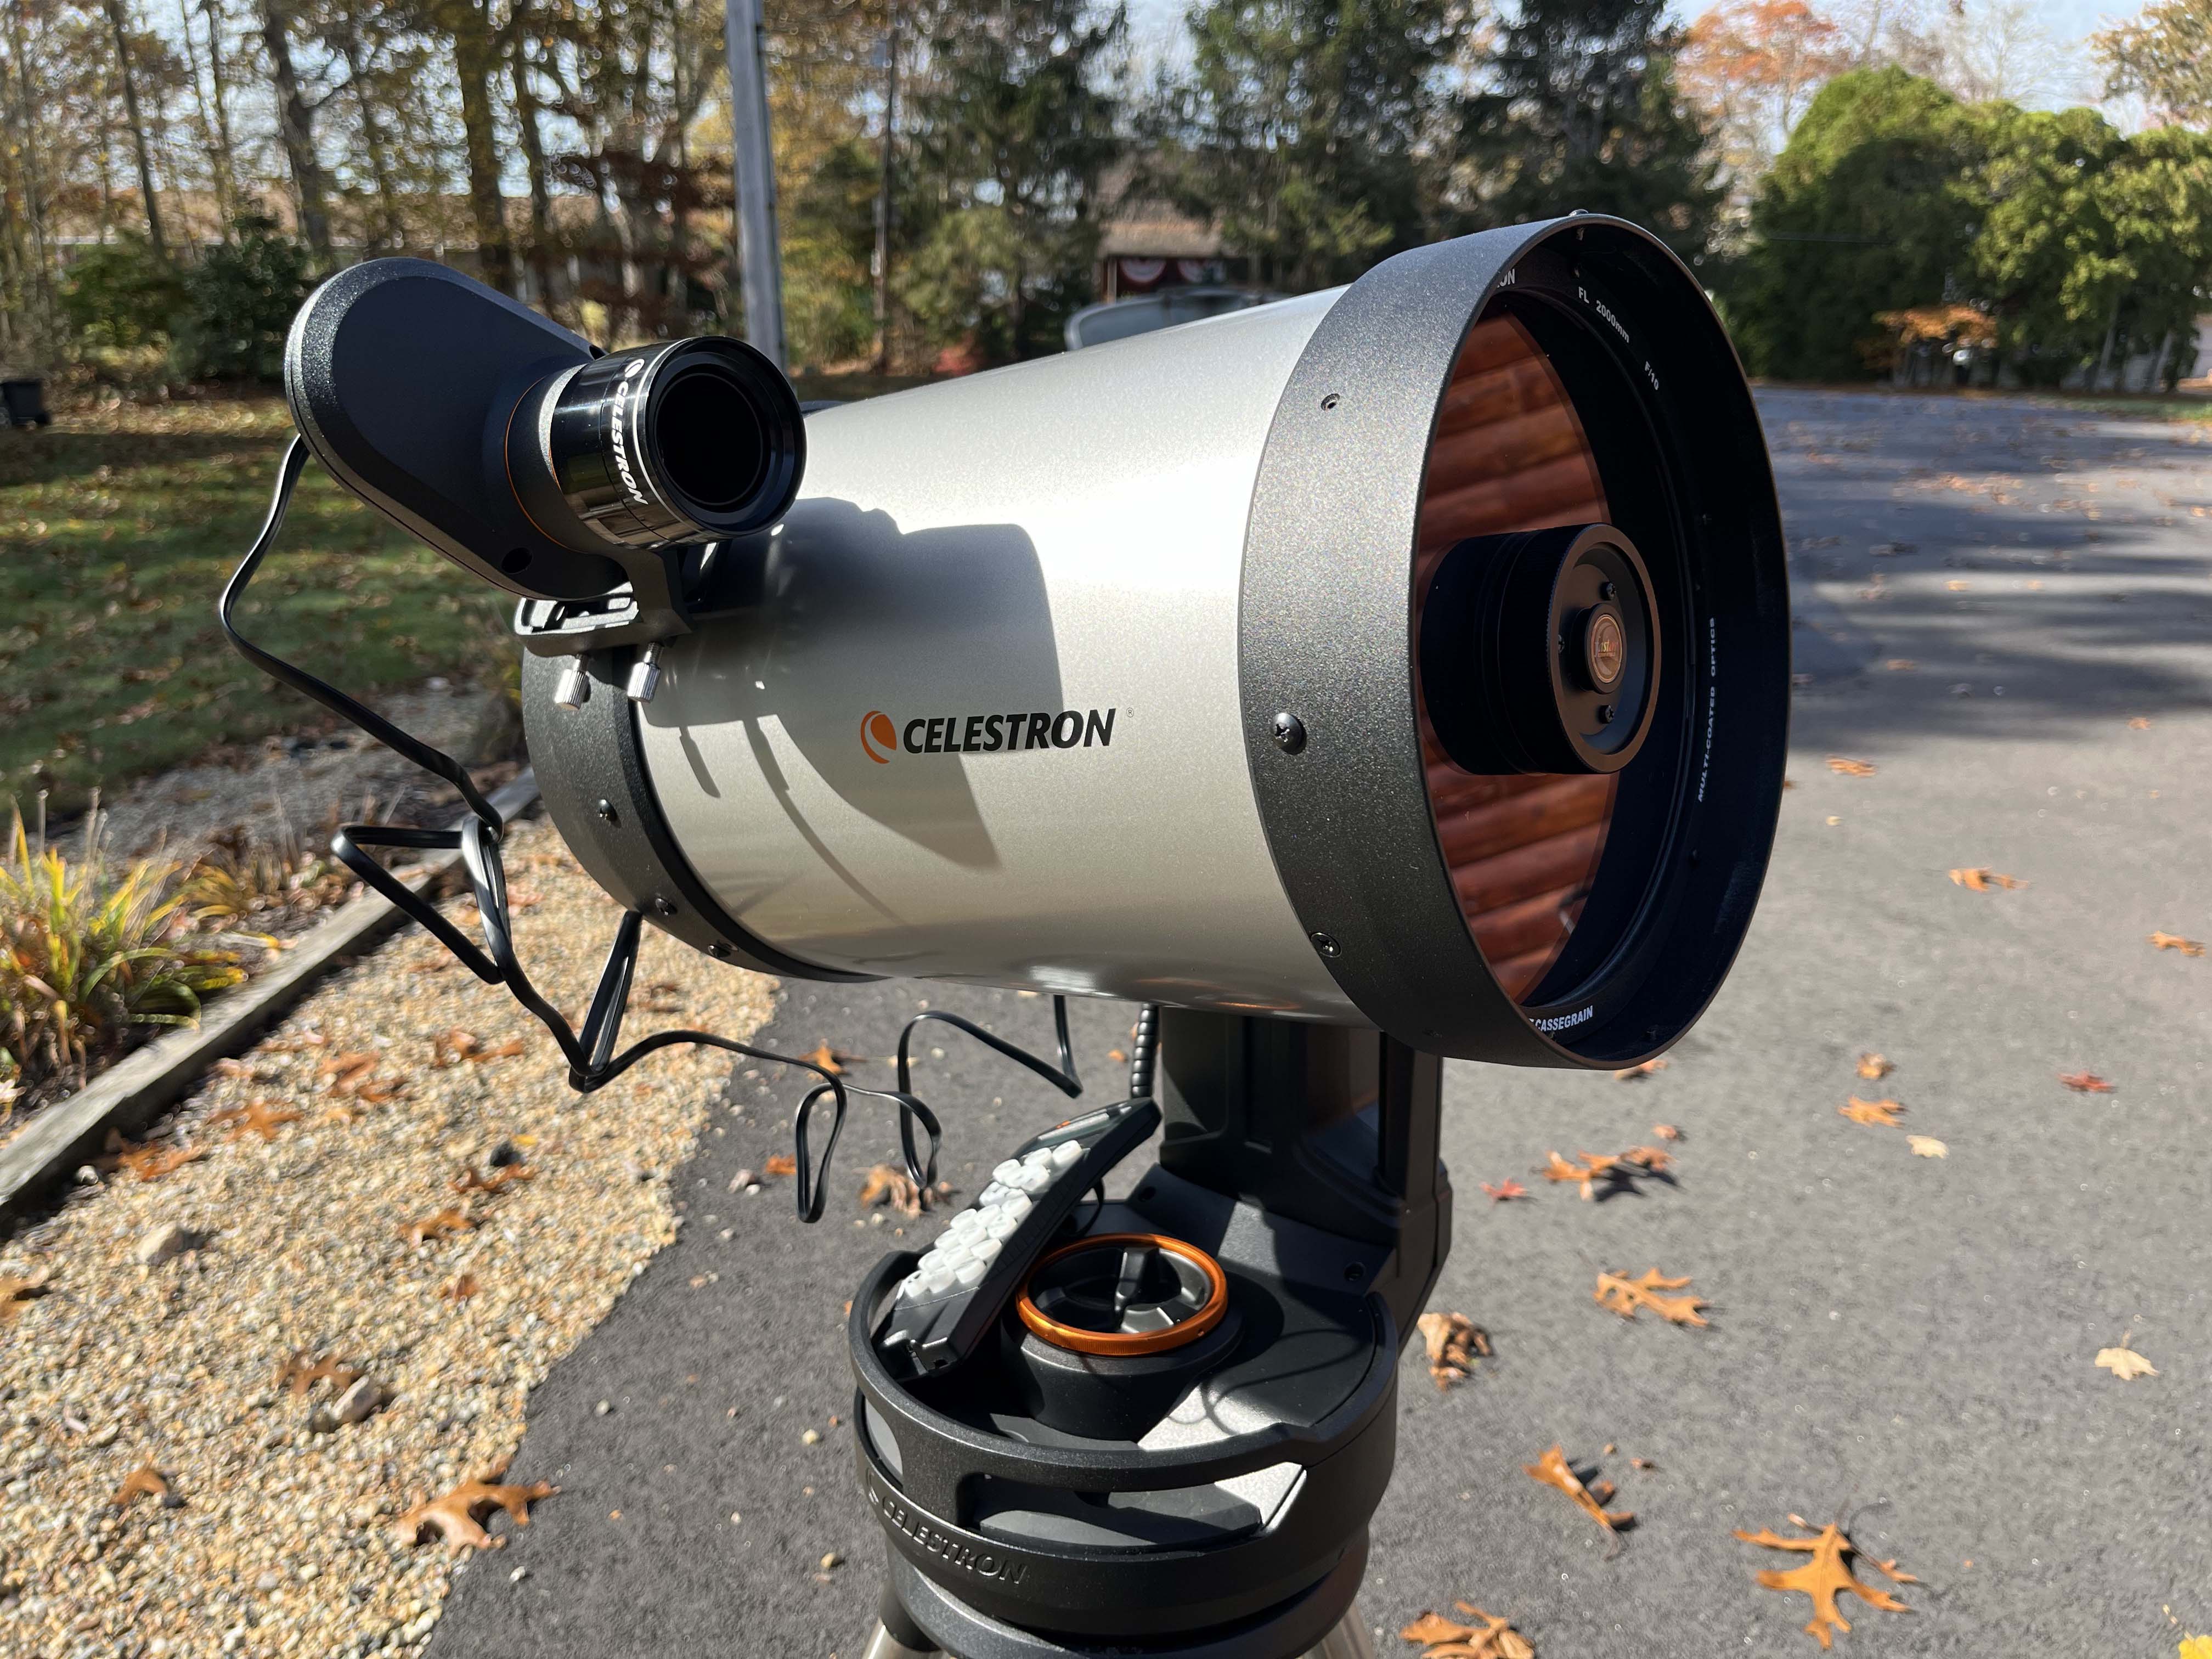
For outreach events I utilize a Celestron 8 inch Evolution Schmidt Cassegrain telescope.
The good thing about this telescope is that it is completely self-contained, including a battery, but the telescope still does need to perform a three star alignment.
I have found that trying to find stars very early in the evening can be difficult, or at least time consuming.
That is where Starsense Autoalign comes in.
Celestron 'Starsense Autoalign' provides a means of performing a very accurate autoalign quickly, easily, and with very few stars visible.
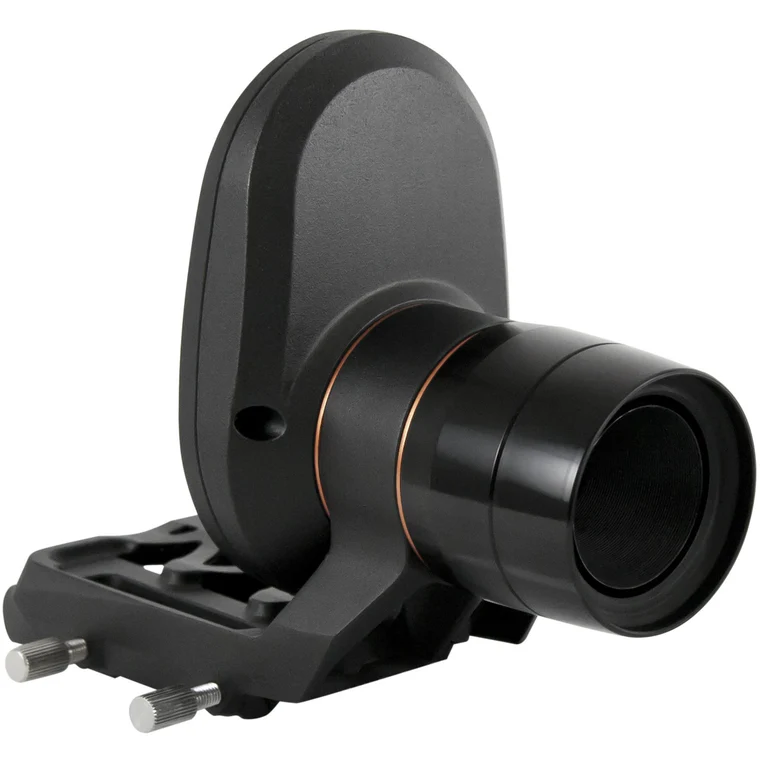
Description of equipment: Celestron sells an adapter called 'Starsense Autoalign'. Starsense Autoalign enables automatic alignment of many but not all Celestron computerized telescopes.
Starsense Autoalign comes with the Starsense camera, a cable to connect the camera to the telescope, and a new hand control specific for Starsense.
Installation: Installation of the Starsense Autoalign attachment is very easy. Simply attach it in place of your red-dot finder or finder scope and plug it into one of the AUX ports.
Then connect the new Starsense hand control to a port rather than using the original hand control.
The first time you use StarSense AutoAlign, StarSense needs to know the center of the telescope’s field of view in relation to its camera.
This one-time calibration process takes place inside the camera and will not require you to physically adjust the camera or your telescope.
After you complete the calibration, you’ll need to perform the StarSense Autoalignment again.
Before calibrating the center position of your telescope, a StarSense Auto or StarSense Manual alignment must first be performed. This allows your telescope to establish tracking and rough GoTo accuracy.
1. Press STARS. The first option shown is Named for named stars. Press ENTER to proceed.
2. Choose a named star from the list. For best results, choose a star that is at least magnitude 2 or less. Use the SCROLL up/down buttons to page through the list of named stars.
Press ENTER to slew to the star. You do not need to know where the star is located. StarSense will slew the telescope to the star for you. It will be the brightest star in that region of sky.
3. Attach your widest angle/lowest power eyepiece to the telescope. Look through the eyepiece to see if the star is there. If you do not see the star in your
eyepiece, using the arrow keys on the hand control move the telescope until the star appears in the eyepiece’s field of view.
4. Press ENTER, once the star is in the field of view of your eyepiece.
The hand control is now in fine centering mode, which has a slow slew rate.
5. Switch to a higher power eyepiece if available. Center the star in the field of view. Make the final centering movements.
A small checkmark will appear on the upper right screen when this is done.
6. Press ALIGN.
StarSense will acquire a new image and note the offset of the star in the camera.
A message will appear: 'Solution Found' with a new center position displayed in coordinates on the camera.
7. Press ENTER to accept the new center reference.
From this point forward, StarSense knows where the center of your telescope’s field of view is in relation to the camera.
You only have to perform this initial calibration once. The next time you go to use your telescope you only have to run the Starsense align function.
How used once calibrated:
1. Set your telescope up with an eyepiece and position the telescope in its home position or index
marks. Equatorial mounts should be roughly polar aligned, but precise polar alignment is not required.
Alt-Az mounts should have the altitude aligned with the tube level to the ground.
2. Turn your telescope on. The StarSense Hand Control and Camera will boot up. It will indicate 'searching for camera'. In about 30
seconds, the Hand Control will display “StarSense Ready.”
3. Press ALIGN, then select STARSENSE AUTO and press ENTER.
4. Press BACK to accept the time, date and location information. Press ENTER to edit the information in the same way that you would without Starsense.
5. Confirm your telescope is positioned in its home position or index marks. Press ENTER when you see the “Set Align Start” screen.
StarSense will begin the alignment procedure. The telescope will begin moving to different areas of the sky automatically. The hand control will display “Acquiring Position,” followed by “Acquiring Image,” followed by “Sensing”.
Starsense will automatically scan four different sections of the sky. Once sensing is complete, the number of stars found will be displayed. If no stars are found, a message “Too Few Stars” will display and StarSense will move the telescope toanother region of sky.
After a successful automatic alignment, StarSense will display “Alignment Complete.”
6. Press ENTER to continue.
You are now ready to slew to any object using the Starsense hand control.
Operation: The operation of the Starsense is very straight forward.
Simply attach Starsense, attach the cable to the mount, attach the Starsense hand control, adjust the telescope so that it is parallel to the ground, and press 'Align' when the camera reports it is ready.
At this point sit back and let the Starsense align your telescope. This will take about 3 minutes.
After Starsense has completed alignment you can use the Starsense hand control to slew to any object just like you did with the original hand control.
Since at this point I can utilize the hand control to slew to any object, I leave Starsense mounted on the telescope.
I have used Starsense on several outreach events and found it to be a quick, easy, and painless operation.
And, best of all, it prodcues a very accurate alignment. This is important in outreach events where you want to show a few (or several) deep sky objects without having to search for them.
Support: I have not had a chance to test Celestron's support for this item. I have used Celestron support for other hardware and found them to respond via e-mail reasonably quick.
Click Below Image(s) for Full Size:
Celestron StarSense Autoalign
Starsense mounted on Celestron Evolution telescope
Starsense mounted on Celestron Evolution telescope
Click to Return to Home Page